下载图床工具
在github上下载安装包:https://github.com/Molunerfinn/PicGo/releases
或者macOS用户使用命令行: brew cask install picgo
windows用户: scoop bucket add helbing https://github.com/helbing/scoop-bucket & scoop install picgo
github图床
1 | { |
- 首先你得有一个GitHub账号
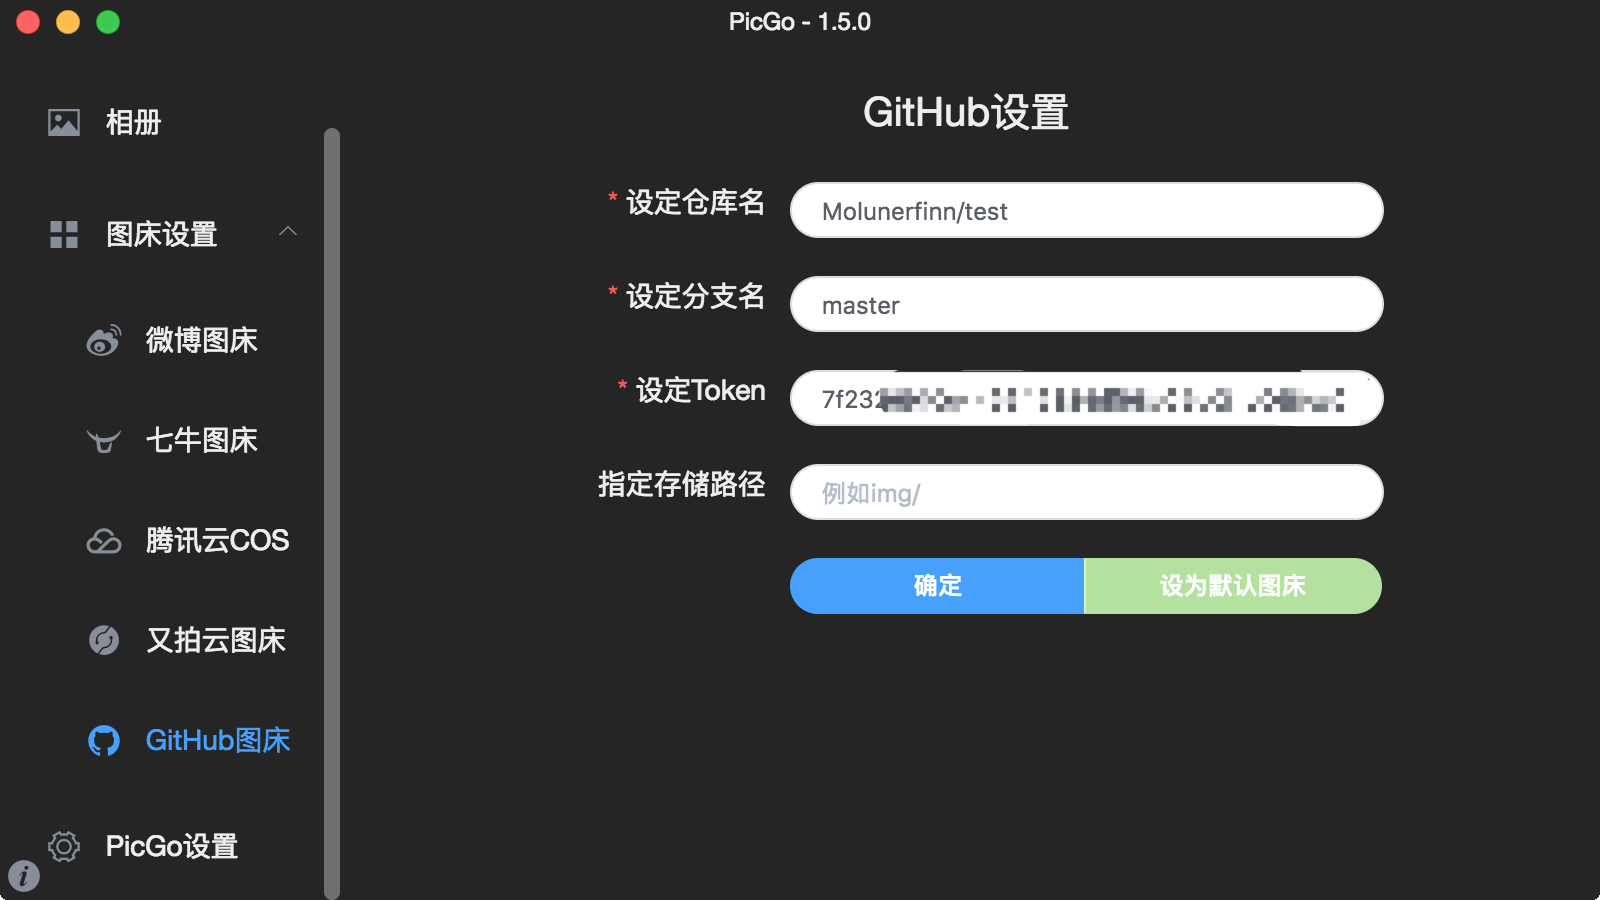
新建一个仓库, 记下你取的仓库名

生成一个token用于PicGo操作你的仓库:
访问:https://github.com/settings/tokens
然后点击
Generate new token。
把repo的勾打上即可。然后翻到页面最底部,点击Generate token的绿色按钮生成token。
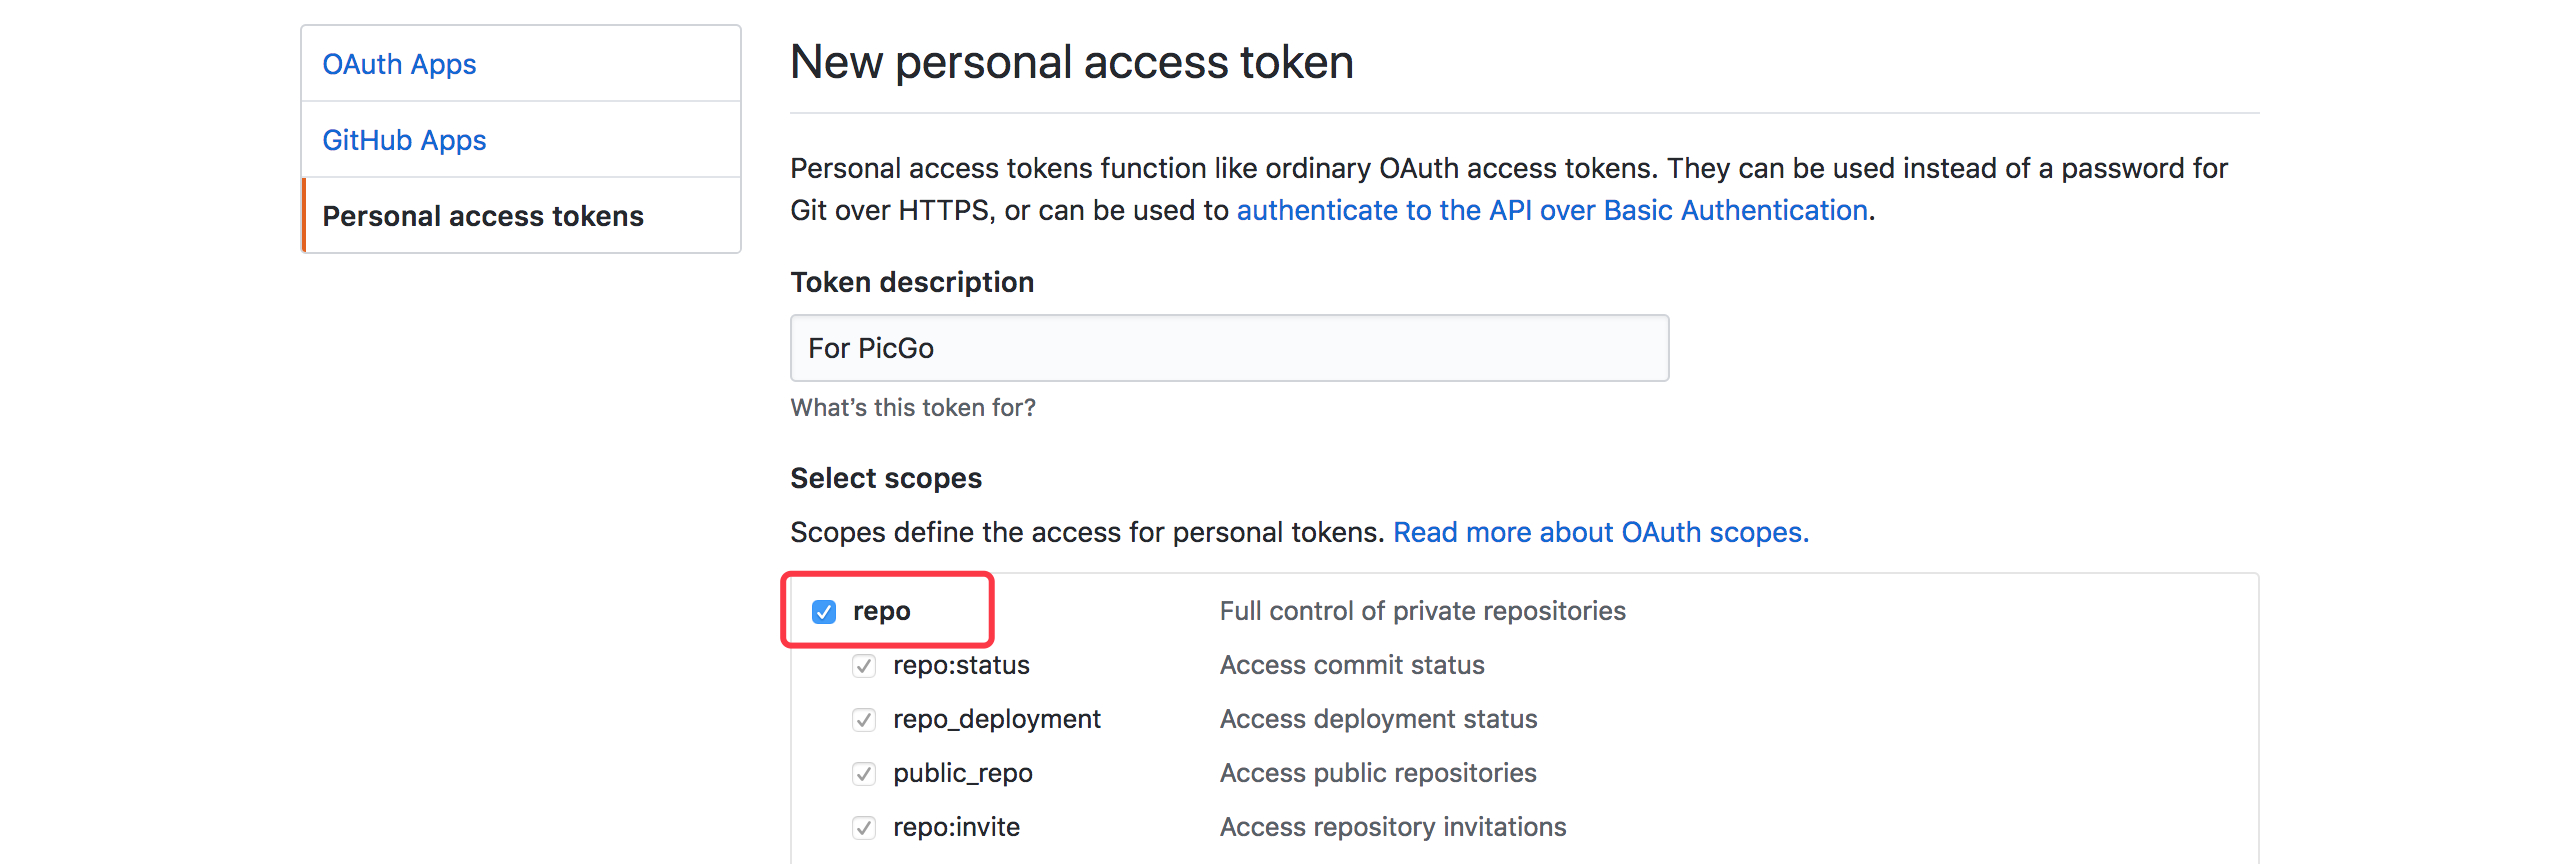
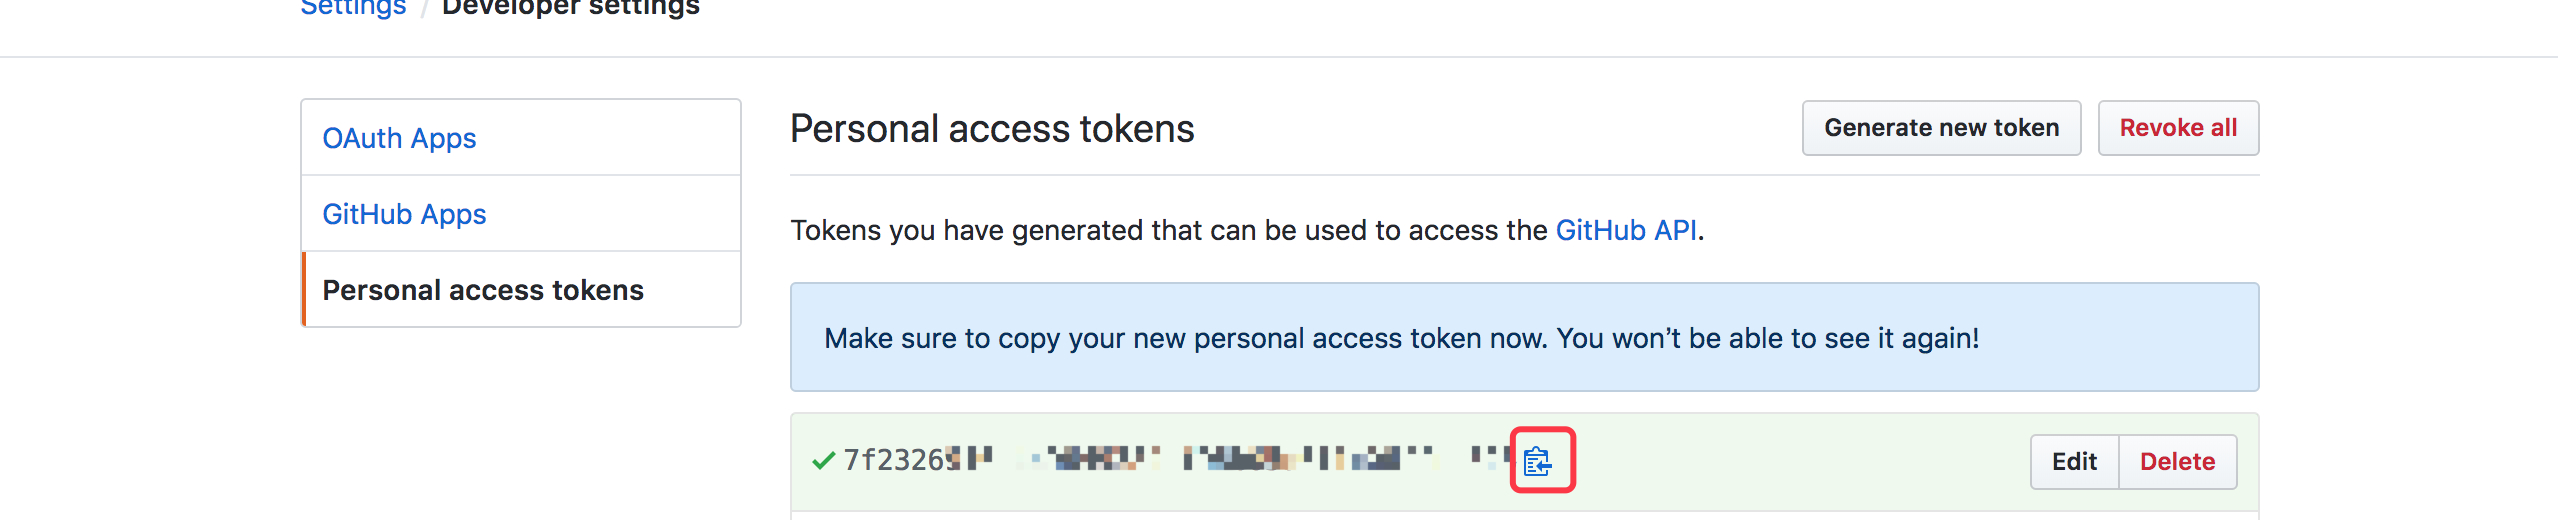
注意:这个token生成后只会显示一次!你要把这个token复制一下存到其他地方以备以后要用。
配置PicGo
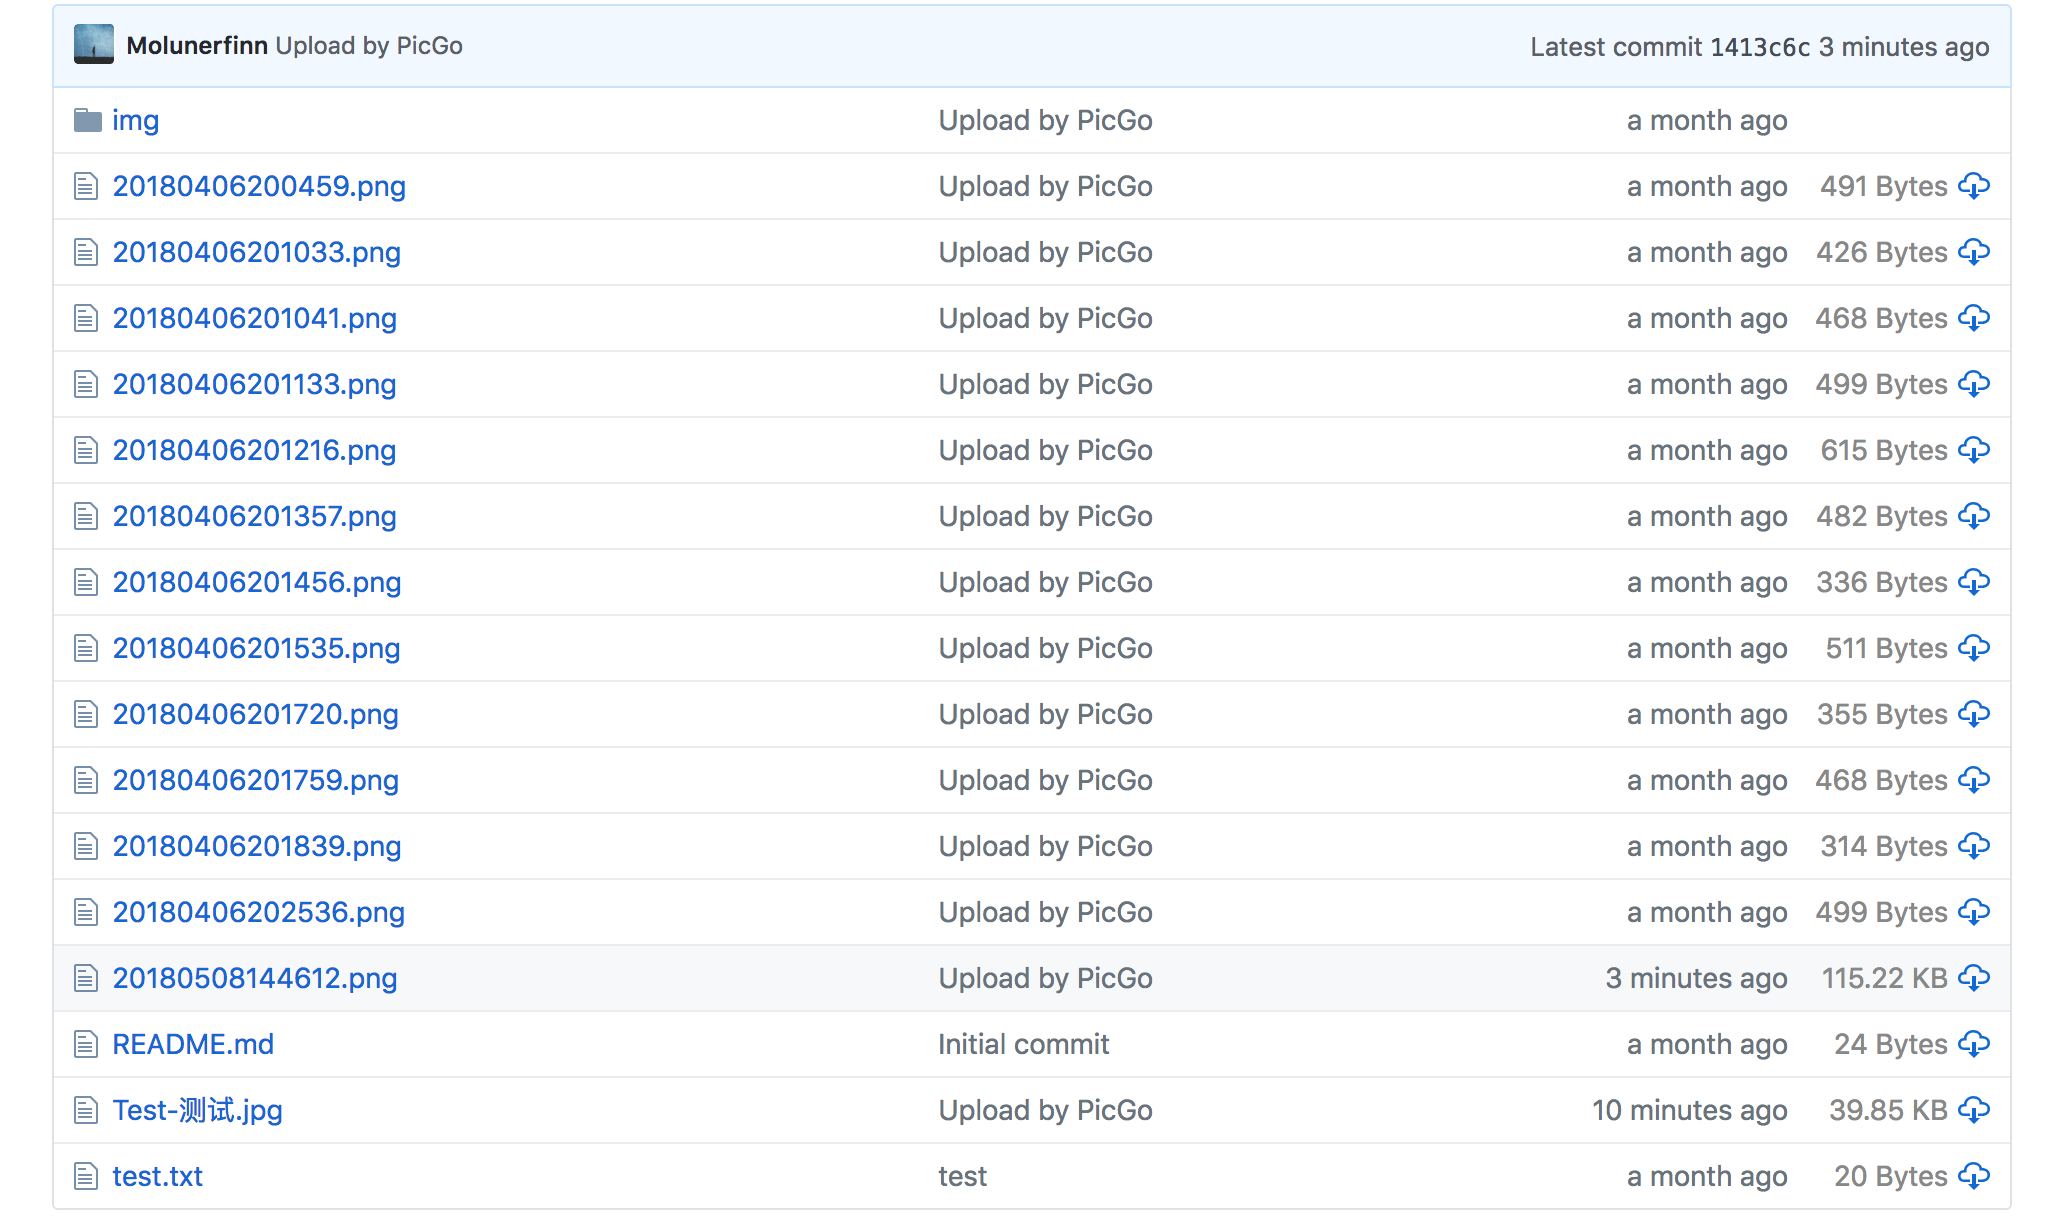
至此配置完毕,已经可以使用了。当你上传的时候,你会发现你的仓库里也会增加新的图片了:
其他类型可参考:https://picgo.github.io/PicGo-Doc/zh/guide/config.html#github%E5%9B%BE%E5%BA%8A